![]() Most of the information here is for Warzone 3.1 and above.
Most of the information here is for Warzone 3.1 and above.
Player Starting Positions
- Aubergine
What are they?
It's easiest to explain with some map previews (click to zoom):
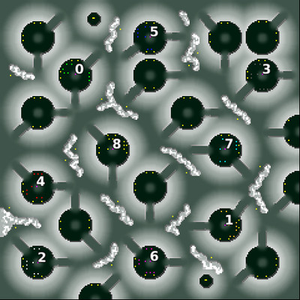
9c-Craters by Slartifartbarstud
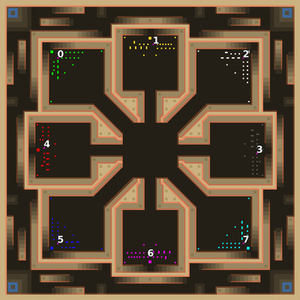
8c-Mero_FierceSQR by Merowingg
The numbers you see on the pictures above are the player starting positions.
Each position on the map defines two things:
- An open slot for a human or AI player
- Where that player who takes the slot will start from when the game begins
Player one starts at position 0, player two at position 1 and so on.
How many positions?
The number of positions possible on a map depends on how many players the version of Warzone can handle:
| Number of Players | Available positions | Warzone Version |
|---|---|---|
| 2 | 0 → 1 | 1.X+ |
| 3 | 0 → 2 | 3.1 B1+ |
| 4 | 0 → 3 | 1.X+ |
| 5 | 0 → 4 | 3.1 B1+ |
| 6 | 0 → 5 | 3.1 B1+ |
| 7 | 0 → 6 | 3.1 B1+ |
| 8 | 0 → 7 | 1.X+ |
| 9 | 0 → 8 | 3.1 B1+ |
| 10 | 0 → 9 | 3.1 B1+ |
If you want your maps to be compatible with the Warzone 2.9 branch, which is still quite common, you will need to limit yourself to using either 2, 4 or 8 players on a map.
It is feasible that future versions of Warzone might allow up to 16 players on a map (positions 0 → 15) due to the fact that there are already 16 colours defined for player factions.
Scavengers
The Scavenger Faction are quite different to all other players:
- They don't use a player slot (so a 10 player map can have 10 players in addition to the Scavenger player)
- They don't have a starting position - it's common to have several pre-defined Scavenger bases on a map
If you plan to put Scavs on your map, you should consider where they will be placed in relation to the other player starting positions.
Location of Starting Positions
This is a very difficult question to answer because it depends on a numerous factors, including your intentions as to how the map should be played. In no particular order, we will take a look at some things that should be considered when deciding where to place starting positions...
Player equilibrium
For most maps, each player should have an equal amount of:
- Building space
- Access to oil – both in the base and further away
- Defensive and fall-back positions
- Mobility – open space and choke points
- Protected vs. Exposed flanks
- Proximity to Scavengers
Essentially, each player should have an equal opportunity to play the game.
Team equilibrium
Often, players will be grouped in to two or more teams.
Just as you should balance each player, you should also balance each team to ensure that no team has a significant advantage over any other team.
You can define default team settings for your map in <mapname>.ini.
Other considerations
It is ultimately up to the person who sets up the game as to how players and teams will be arranged. However, as a map maker you will likely have a good idea of which player and team configurations are best suited to your map, so it's worth posting some guidance as to what works best.
A good example of this is the 9c-ambulant map made by tmp:

At first glance you can probably think of several possible player/team configurations for this map – but without trying all of them, you can't be sure which will give a balanced game. Considering that the map is quite unique in design, the decision making process is even harder than usual.
So, tmp clarified the best configuration when he posted the map:
... intended to be played as 3vs3vs3 (012 vs 345 vs 678) sorta a ffa team map
When you look at the map again, is that the configuration you immediately thought of when you first saw the map?
Because tmp had spent a lot of time developing the map and testing it, he knew the best configuration to use... just as you will know the best configuration for your own maps, so tell people what it is!
Tip: If you want to learn more about tmp's map design process, check out Map Sketching which showcases several of his maps.
Order of Starting Positions
This is possibly the most ignored aspect of map making. The way in which you order starting positions can have a big impact on how easy it is to set up a game on your map.
Note: Kudos to Merowingg whom I had a long PM conversation with about this subject. I learnt a lot and will do my best to describe below...
To illustration the concepts in this section, we'll use Mero's 8-player FierceSQR map:
As you can see, each player gets an equal amount of oil, building space, high ground, mobility, exposed flanks and so on. Some of the base entrances are wider (more mobility) but are also longer to compensate for that fact.
But what is most interesting is the order of the starting positions.
If you go round the map clockwise, you'll notice: 0 → 3 then 7 → 4.
Why is it done this way? Why not use sequential positions resulting in 0 → 7?
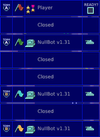
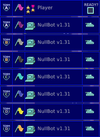
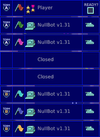
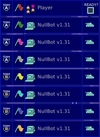
Player / Team configurations
Numerous configurations are available and they are all easy to set-up...
| 1v1 | 1v1v1v1 | |||
|---|---|---|---|---|
 |  |  |  |  |
| 2v2 | 2v2v2v2 | 3v3 | 4v4 | |
 |  |  |  |  |
Nasty players
There are, unfortunately, some very self-centred players around who will try and use weak allies as "meat shields" so they can tech rush, or position themselves next to weak enemies so they have an easy victim to take out in the early stages of the game.
To achieve these aims, nasty players often try and get position 0 for themselves, and then put a weak player in position 3 or 7 (assuming an 8 player map). In Mero's map, positions 3 and 7 are both on the opposite side of the map to position 0.
Even if a nasty player realises this crafty position ordering, it won't do them much good. They could take positions 1 or 2 to ensure they are not next door to an enemy, but in such cases enemy fire will tend to be fairly equally distributed across the nasty player's neighbours (note the lengths of the base entrances). And if they take position 0 or 3 in the hope of getting next to a weak enemy, they're going to encounter the troops of that player's friendly neighbour while trying to get to their base.
Contents
Jump to: